Homemade tapioca holds a special place in the culinary landscape of Bahia, particularly in its interior. Beyond being a simple dish, it represents a deep-rooted tradition, a connection to the land, and a testament to the resourcefulness of its people. While pre-hydrated tapioca flour is widely available, the act of preparing tapioca from scratch, beginning with the raw cassava root to achieve the perfect “goma,” is an art form. This meticulous process ensures unparalleled freshness, an authentic taste, and a texture that pre-packaged alternatives often cannot replicate. For those seeking to truly immerse themselves in Bahian gastronomy and unlock the secrets of this ancestral food, mastering the creation of homemade tapioca dough is an indispensable step. It’s a journey that combines agricultural understanding, traditional techniques, and culinary precision, yielding a product that is both nutritious and deeply satisfying.
This comprehensive guide will walk you through every step of making homemade tapioca goma, from selecting the right cassava roots to achieving the ideal hydration. We will detail the essential ingredients, the tools required, and the precise techniques to ensure your homemade tapioca dough is perfect for crafting delicious, authentic Bahian tapiocas. By following this detailed recipe, you will not only produce exceptional goma but also gain a profound appreciation for the artisanal process behind this cherished Brazilian staple.
Selecting the Right Cassava (Manioc): The Foundation of Quality Goma
The journey to perfect homemade tapioca dough begins long before you step into the kitchen, right at the source: the cassava root itself. Known as mandioca or macaxeira in Brazil, this starchy tuber is the sole ingredient for tapioca goma. Selecting high-quality cassava is paramount, as it directly influences the yield, flavor, and texture of your finished tapioca. Understanding the characteristics of good cassava roots is the first secret to authentic Bahian tapioca.
Characteristics of Ideal Cassava Roots
When choosing cassava, look for roots that are:
Firm and Free of Blemishes: The skin should be smooth, without any soft spots, mold, or discolored patches. Softness indicates spoilage, which can compromise the taste and safety of the goma.
Intact and Undamaged: Avoid roots that are cracked, bruised, or have cuts, as these can introduce bacteria and lead to rapid deterioration. The integrity of the root helps maintain its freshness.
Freshly Harvested: Ideally, cassava should be processed soon after harvest. If buying from a market, inquire about the harvest date. Fresher roots yield a higher starch content and better flavor.
No Green or Blue Discoloration: A greenish hue under the skin or blue-black streaks inside the root are signs of oxidation and spoilage, known as “physiological deterioration.” This makes the cassava fibrous, bitter, and potentially toxic if consumed in large quantities without proper processing. Always cut a small piece off the end to inspect the interior if possible.
Evenly Sized (Optional but helpful): While not strictly necessary for quality, roots of similar size can make peeling and grating more consistent.
Types of Cassava: A Crucial Distinction
It is vital to understand that there are two main types of cassava, classified by their cyanide content:
Sweet Cassava (Manioc/Macaxeira): This type has low levels of cyanogenic glycosides and is safe for consumption after simple cooking like boiling or frying. It is the preferred choice for making tapioca goma at home, as it requires less rigorous processing to eliminate toxins.
Bitter Cassava (Aipim/Mandioca Brava): This variety contains significantly higher levels of cyanide and requires extensive processing, including grating, washing, pressing, and fermentation, to make it safe for consumption. This type is typically used for industrial-scale flour production and should generally be avoided for homemade tapioca goma unless you are extremely experienced and knowledgeable in traditional detoxification methods.
For homemade tapioca dough, always opt for sweet cassava. If unsure, purchase from a reputable vendor who can confirm the type. The peace of mind and safety provided by using sweet cassava cannot be overstated. By carefully selecting your cassava, you lay the groundwork for a safe, delicious, and truly authentic Bahian tapioca experience.
Essential Tools and Ingredients for Goma Production
Crafting tapioca goma from scratch requires more than just cassava; it demands a specific set of tools and a keen understanding of the simple, yet crucial, ingredients involved. While the process is minimalist, the precision in tool selection and ingredient handling significantly impacts the final quality of the goma. Equipping your kitchen with the right implements and understanding the role of each component is vital for success.
Key Tools You’ll Need
The following tools will facilitate an efficient and authentic goma production process:
Sharp Knife and Vegetable Peeler: For peeling the tough outer skin of the cassava roots. A sharp knife is essential for safety and efficiency.
Large Grater: This is perhaps the most critical tool.
Traditional Option: Manual Box Grater or Hand Grater: A sturdy metal grater with medium to fine holes is ideal. The goal is to produce a fine, fluffy pulp.
Modern/Efficient Option: Food Processor with Grating Disc: For larger quantities, a food processor can save considerable time and effort, ensuring uniform grating.
Large Mixing Bowls: Several bowls will be needed for washing, collecting grated cassava, and containing the starch solution.
Fine-Mesh Sieve or Cheesecloth: Absolutely essential for separating the starch from the fibrous pulp and for refining the goma. A nut milk bag can also work effectively.
Large Spoon or Spatula: For stirring and handling the pulp and starch.
Heavy-Duty Cotton Cloth (e.g., dish towel, clean pillowcase): For pressing the grated cassava to extract the starch. The cloth needs to be strong enough to withstand squeezing.
Large Pot or Bucket: For the sedimentation process, allowing the starch to settle.
Measuring Cups and Spoons (Optional, for consistency): While traditional methods often rely on intuition, these can help maintain consistency for beginners.
Airtight Storage Container: For storing the finished, hydrated goma.
The Sole Ingredient: Cassava Root
As previously discussed, the sweet cassava root is the star and virtually the only ingredient. Its starch content dictates the quantity of goma produced. No artificial thickeners, binders, or preservatives are used in authentic homemade tapioca goma. The purity of the cassava starch is what gives tapioca its distinctive light, slightly chewy texture and subtle flavor.
Optional: Water for Washing and Hydration
While not an “ingredient” in the strictest sense, clean, filtered water is crucial throughout the process:
Washing Cassava: To remove dirt and impurities from the roots.
Starch Extraction: To help rinse starch from the pulp and facilitate the sedimentation process.
Hydration of Goma: To adjust the moisture content of the dried goma, creating the perfect “dough” consistency for cooking. The quality of the water, free from strong odors or tastes, will contribute to the neutral flavor profile of the tapioca.
By having these tools and the primary ingredient ready, you set the stage for a successful and enjoyable tapioca goma production experience, ensuring each step is performed with the precision that defines Bahian culinary tradition.
Step-by-Step Guide: Producing Tapioca Goma from Raw Cassava
Producing tapioca goma from raw cassava is a rewarding process that, while requiring patience, is straightforward once the steps are understood. This detailed guide breaks down the transformation of the humble cassava root into the delicate, ready-to-cook goma, replicating the authentic methods used in the interior of Bahia.
Phase 1: Preparation of the Cassava Root
Peel the Cassava:
Using a sharp knife and/or a vegetable peeler, carefully remove the thick, brown outer skin of the cassava root. It’s often easier to cut the root into manageable 4-6 inch (10-15 cm) pieces first.
Ensure all the brown skin and the thin, pinkish-white layer just beneath it are removed, exposing the pure white flesh. Any residual skin can affect the taste.
Wash and Cut:
Thoroughly wash the peeled cassava pieces under cold running water to remove any dirt or remaining peel fragments.
Cut the cassava into smaller chunks (about 1-2 inches or 2.5-5 cm) that are suitable for your grater or food processor. This makes grating much easier and reduces strain on your equipment.
Phase 2: Grating and Starch Extraction
Grate the Cassava:
Manual Grating: Using a fine-mesh box grater, carefully grate all the cassava chunks. Work steadily to create a uniform, fine pulp. This is the most labor-intensive step.
Food Processor: If using a food processor, attach the grating disc. Process the cassava chunks in batches until you have a fine, consistent pulp. Avoid over-processing, which can turn it into a paste. The goal is a fluffy, moist texture.
Extract the Starchy Liquid:
Place a large, clean, heavy-duty cotton cloth or cheesecloth over a large mixing bowl.
Transfer a generous portion of the grated cassava pulp into the center of the cloth.
Gather the edges of the cloth, forming a bag, and begin to squeeze and twist vigorously. The starchy, milky liquid will drain into the bowl below.
Continue squeezing until as much liquid as possible has been extracted and the pulp feels relatively dry. You may need strong hands or enlist help for this step.
Repeat this process with the remaining grated cassava pulp until all the liquid has been extracted.
Discard the solid pulp: The remaining fibrous pulp (known as bagaço in Portuguese) can be discarded or composted. It contains very little starch and is not used for tapioca goma.
Phase 3: Sedimentation and Drying of the Goma
Sedimentation:
Allow the milky, starchy liquid collected in the bowl to sit undisturbed for at least 4-6 hours, or preferably overnight (8-12 hours). During this time, the fine starch particles will slowly settle to the bottom of the bowl, forming a dense white layer, while clear water will separate and rise to the top.
Drain the Water:
Carefully, and without disturbing the settled starch layer, gently pour off the clear water from the top of the bowl. You can use a ladle for the initial removal, then tilt the bowl slowly to drain the remaining water. The goal is to remove as much water as possible without losing any of the precious starch. You will be left with a firm, moist white block of starch at the bottom.
Light Drying (Optional, but recommended for longer storage):
Gently break up the moist starch block. Spread the starch in a thin layer on a clean baking sheet lined with parchment paper or a clean, dry cloth.
Allow it to air dry in a well-ventilated area at room temperature for a few hours, or until it has a crumbly, powdery texture, similar to coarse flour, but still with a hint of moisture. Avoid direct sunlight or excessive heat, as this can affect its quality. This step is crucial if you plan to store the goma for a few days before hydration.
Phase 4: Hydrating the Goma to “Dough” Consistency
Break Up the Dried Goma:
Once the starch is lightly dried and crumbly, transfer it back into a clean mixing bowl.
Use your hands to break up any remaining clumps, making sure it’s fine and granular.
Hydrate the Goma:
Gradually add small amounts of clean, cold water to the dried goma, mixing continuously with your hands.
The goal is to achieve a consistency where the goma is evenly moist, feels like coarse wet sand, and, when squeezed gently in your palm, forms a soft clump that easily breaks apart when lightly pressed. It should not be watery or overly sticky.
This hydration process is critical. Too much water will result in a soggy tapioca that won’t crisp, and too little will make it dry and crumbly. Adjust the water slowly and feel the texture as you go. This is where intuition and practice come into play.
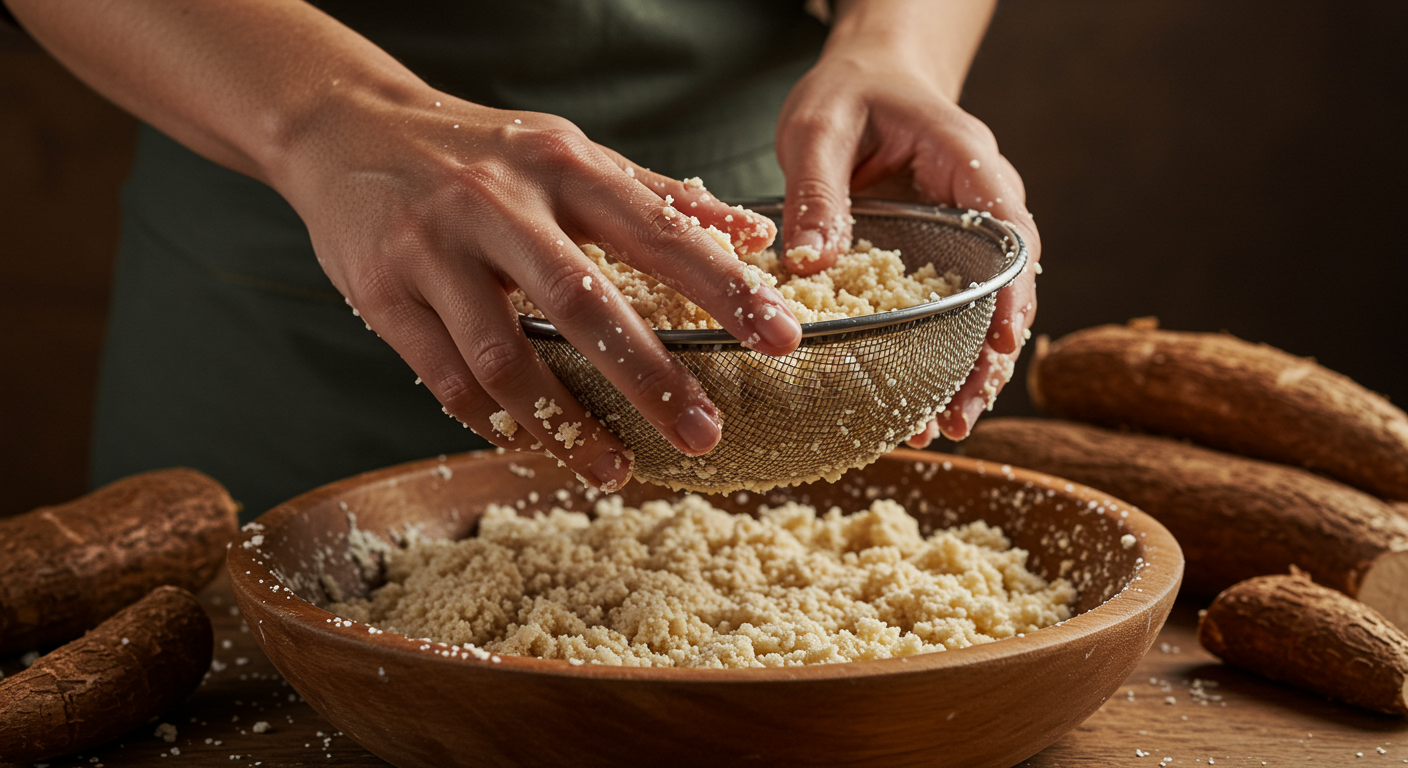
Refine the Goma (Final Sieving):
For the ultimate smooth tapioca, pass the hydrated goma through a fine-mesh sieve (peneira) directly before cooking. This ensures a perfectly uniform, lump-free “tapioca dough” ready for the griddle. This final sieving step is what gives Bahian tapioca its characteristic delicate and even texture.
By diligently following these steps, you will successfully transform raw cassava into perfectly hydrated, ready-to-cook tapioca goma, embodying the true spirit of Bahian culinary tradition.
Troubleshooting Common Issues in Homemade Goma Production
Even with a detailed recipe, challenges can arise when making tapioca goma from scratch. Understanding common pitfalls and how to address them is part of mastering the art. This section provides solutions to frequently encountered problems, ensuring your homemade goma consistently meets the high standards of Bahian tradition.
Goma is Too Dry or Crumbly
Problem: After hydration, the goma doesn’t form a cohesive disc on the griddle; it crumbles apart. Cause: Insufficient moisture during the hydration phase. Solution:
Gradual Rehydration: Transfer the dry goma back to a bowl.
Add Water Slowly: Drizzle very small amounts of cold water (e.g., a teaspoon at a time) over the goma.
Mix and Feel: Mix with your hands, gently rubbing the goma between your palms to distribute the moisture evenly. Continue adding water in tiny increments until the goma, when squeezed, forms a soft clump that still breaks apart easily when pressed.
Resieve: If necessary, pass the rehydrated goma through a fine-mesh sieve again to ensure uniform moisture and remove any small clumps that may have formed.
Goma is Too Wet or Sticky
Problem: The goma feels overly wet, forms a sticky paste, and sticks excessively to the pan, resulting in a soggy tapioca. Cause: Too much water added during hydration or insufficient draining after sedimentation. Solution:
Air Dry: Spread the overly wet goma in a thin layer on a clean baking sheet or a wide, shallow plate.
Evaporate Moisture: Allow it to air dry at room temperature for 30 minutes to a few hours, stirring occasionally to expose all sides to the air. You can also place it in front of a fan for faster drying, but avoid direct heat sources.
Mix with Dry Goma (if available): If you have some extra dry goma, you can mix it in to absorb excess moisture.
Resieve: Once it reaches the desired “wet sand” consistency, pass it through a sieve again.
Tapioca has a Sour or Off-Flavor
Problem: The cooked tapioca has an unpleasant sour or slightly bitter taste. Cause: * Spoiled Cassava: Using old or discolored cassava roots. * Incomplete Fermentation (Bitter Cassava): If bitter cassava was mistakenly used without proper and extensive detoxification processes. * Contamination during Sedimentation: Starch liquid left uncovered or for too long in warm conditions, leading to bacterial growth. Solution:
Discard and Restart: For safety, if you suspect spoilage or incorrect cassava type, it’s best to discard the batch and start over with fresh, sweet cassava.
Ensure Cleanliness: Always use thoroughly clean tools and containers.
Prompt Processing: Process cassava as soon as possible after peeling.
Proper Sedimentation Time: Do not leave the starchy water to settle for excessively long periods in warm environments; overnight in a cool place is usually sufficient.
Goma is Lumpy or Uneven
Problem: The final goma contains small, hard clumps, leading to unevenly textured tapioca. Cause: * Inadequate grating of cassava. * Insufficient mixing during hydration. * Skipping the final sieving step before cooking. Solution:
Re-Sieve Rigorously: The most effective solution is to pass the goma through a fine-mesh sieve multiple times. Use the back of a spoon or your hands to gently push the goma through the mesh, breaking up all clumps.
Proper Grating: Ensure the initial cassava grating is as fine and uniform as possible.
Thorough Hydration Mixing: When adding water, mix vigorously with your hands to ensure every particle absorbs moisture evenly.
By being aware of these common issues and their respective solutions, you can confidently navigate the homemade goma production process, ensuring a consistently high-quality product that captures the authentic taste and texture of Bahian tapioca.
Storing Your Homemade Tapioca Goma for Freshness
Proper storage is crucial for maintaining the quality and freshness of your homemade tapioca goma. Once you’ve gone through the effort of producing it from scratch, you’ll want to ensure it remains perfect for subsequent use. The goal is to prevent spoilage, retain moisture, and preserve its delicate texture. Bahian culinary practices often involve making batches of goma to last for several days, highlighting the importance of effective storage methods.
Short-Term Storage (Up to 3-5 Days)
For goma intended for use within a few days, the following method is ideal:
Airtight Container: Transfer the freshly hydrated goma (after the final sieving) into an airtight plastic or glass container. This prevents moisture loss and protects it from absorbing odors from other foods in the refrigerator.
Refrigeration: Store the sealed container in the refrigerator. The cool temperature will significantly slow down any potential microbial growth and maintain freshness.
Avoid Freezing (Generally): While tapioca goma can technically be frozen, it often alters the texture upon thawing, making it less ideal for the delicate, fresh tapioca experience. For short-term use, refrigeration is superior.
Check Before Use: Before each use, visually inspect the goma for any signs of mold or off-odors. If any are present, discard the batch for safety. Stir the goma gently before cooking, as some moisture might settle at the bottom.
Longer-Term Storage (Not Typically Recommended for Fresh Goma)
For truly authentic Bahian tapioca, it is generally recommended to use freshly prepared or short-term stored goma. However, if you must store it for longer periods, consider these points:
Dried Starch Option: If you plan to make a large batch and store it for weeks or months, it is better to fully dry the separated starch into a fine powder (flour). This can then be stored in an airtight container in a cool, dark place. When ready to use, you will need to rehydrate it thoroughly by adding water gradually and sieving, as described in Phase 4 of the production guide. This method maintains quality better than freezing the hydrated goma.
Freezing Dried Goma (Advanced): Some techniques involve freezing the fully dried and sieved goma, but this requires careful thawing and rehydration to avoid textural issues. This is not the traditional method for ready-to-use goma.
Tips for Maintaining Goma Quality
Handle with Clean Utensils: Always use clean spoons or spatulas when retrieving goma from the container to prevent contamination.
Keep Sealed: Ensure the container is tightly sealed after each use to minimize exposure to air.
Observe and Adapt: Pay attention to how your goma behaves over time. Factors like ambient humidity and refrigerator temperature can subtly affect its condition. Adjust your hydration and storage routines as needed based on observation.
By adhering to these storage guidelines, you can ensure that your homemade tapioca goma remains in prime condition, ready to be transformed into delicious, authentic Bahian tapiocas whenever the craving strikes, preserving the effort and tradition poured into its creation.
Practical Manual: From Choosing Cassava to the Perfect Tapioca Point
Mastering homemade tapioca goma is a journey of precision and sensory understanding, deeply rooted in Bahian tradition. This practical manual condenses the entire process, offering a quick reference for each stage, from the initial selection of raw material to preparing the goma for cooking. Following these guidelines ensures an authentic and high-quality product, laying the foundation for a truly Bahian tapioca experience.
Pre-Goma Production Checklist
Step
Description
Key Considerations
1. Cassava Selection
Choose sweet cassava roots (mandioca/macaxeira).
Firm, unblemished, no green/blue discoloration.
2. Peeling & Washing
Remove all brown and pinkish skin. Wash thoroughly.
Use a sharp knife/peeler for safety.
3. Cutting
Cut peeled cassava into small chunks.
Suitable size for grater/food processor.
4. Grating
Grate cassava into a fine, uniform pulp.
Manual grater or food processor with grating disc. Avoid paste-like consistency.
5. Starch Extraction
Squeeze pulp in a heavy-duty cloth to extract milky liquid. Discard fibrous residue.
Squeeze vigorously to maximize liquid extraction.
6. Sedimentation
Let starchy liquid sit for 4-12 hours until starch settles.
Uncover or loosely cover in a cool place. Do not disturb.
7. Draining
Carefully pour off clear water, leaving moist starch block.
Avoid disturbing the settled starch.
8. Light Drying
Break up moist starch, spread thinly to air dry until crumbly. (Optional, for storage or easier handling)
Well-ventilated area, avoid direct heat/sun. Not fully dry.
Goma Hydration & Final Preparation Checklist
Step
Description
Key Considerations
1. Break Up Goma
Ensure any lightly dried goma is free of large clumps.
Use hands to gently break apart.
2. Hydration
Gradually add small amounts of cold water to the goma.
Mix continuously until ‘wet sand’ consistency, forming a soft, crumbly clump when squeezed.
3. Final Sieving
Pass hydrated goma through a fine-mesh sieve (peneira) immediately before cooking.
Essential for uniform, lump-free ‘tapioca dough’. Use a spoon to push through.
4. Storage
Store hydrated goma in an airtight container in the refrigerator for up to 3-5 days.
Check for spoilage before use. Stir gently if moisture separates.
This systematic approach, combining traditional wisdom with practical tips, empowers you to create authentic Bahian tapioca goma from scratch. Each stage is crucial, contributing to the delicate texture and nuanced flavor that define this beloved culinary staple. By adhering to these steps, you not only prepare a dish but also honor a rich cultural heritage.
The creation of homemade tapioca dough is a journey deeply rooted in the heart of Bahian culinary tradition. It is a process that transcends simple cooking, becoming an act of cultural preservation and a testament to the purity of natural ingredients. From the careful selection of firm, unblemished sweet cassava roots to the meticulous steps of grating, extracting, sedimenting, and finally hydrating the pristine goma, each stage contributes to the unparalleled authenticity of the final product. The “wet sand” texture, achieved through precise hydration and the crucial final sieving, is the hallmark of a goma ready to be transformed into a perfectly crisp yet tender tapioca.
While modern conveniences offer shortcuts, the commitment to crafting goma from scratch provides a depth of flavor and texture that pre-packaged alternatives rarely match. It is a connection to the land, to the hands that have performed these rituals for generations, and to the very essence of Bahian gastronomy. By following this detailed recipe and troubleshooting guide, you are not just preparing a meal; you are embracing a significant piece of Brazilian heritage. Equip yourself with the right tools, cultivate patience, and savor the rewarding experience of bringing truly homemade Bahian tapioca to your table.